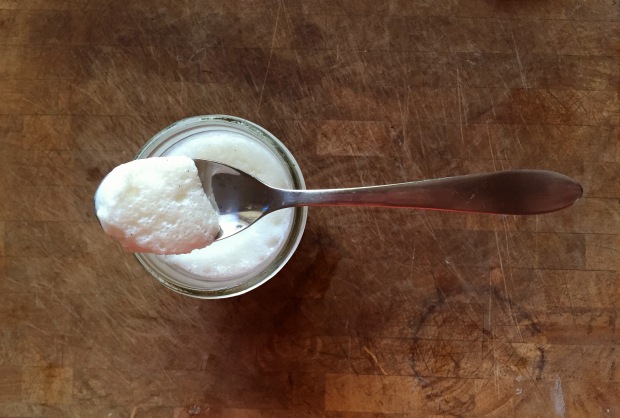
Panna Cotta

Panna cotta is an Italian dessert which means cooked cream.  Because panna cotta is sweet cream that has been thickened it can be classified as a pudding.  Panna Cotta is made very similar to classic pudding, except it is made without eggs, and does not require a long cook time over the stop top.

Panna cotta is served chilled and often presented with fresh berries or a sauce of honey, caramel or chocolate.  Some choose to top panna cotta with flavored liqueurs.  Panna cotta is similar to a bavarian cream, however, unlike panna cotta, bavarian cream does include eggs.

img_4140

This recipe is for a vanilla flavored panna cotta.  I have found that the best panna cotta is made using the insides of vanilla beans, also known as vanilla bean caviar.  Vanilla bean caviar gives the best vanilla flavor and compliments the delicate nature of the panna cotta.  Apart from vanilla, any flavor panna cotta can be made by swapping out the vanilla extract for a different extract flavor.  Some of the more popular panna cotta flavors are almond, rum, coffee and caramel.

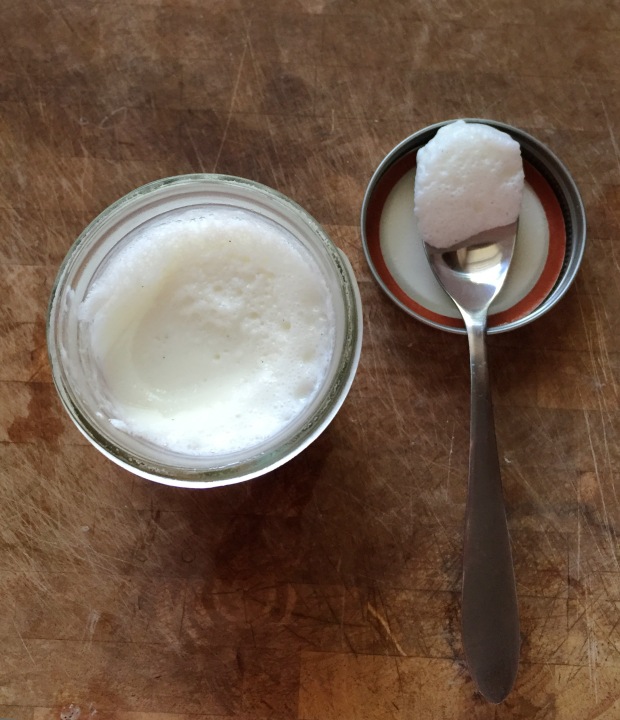
img_4141

As mentioned above, panna cotta differs from other puddings.  Panna cotta does not include eggs.  Panna cotta also uses gelatin instead of cornstarch to thicken the creamy mixture.  In regards to gelatin, there are a lot of gelatin brands on the market.  Selecting a good gelatin is actually pretty important.  Over the years I have used several brands of gelatin and they are all not created equally.  When it comes to gelatin, quality and purity matter.  I have found the best gelatin to be Great Lake Beef Gelatin.  If you read how they prepare and extract their gelatin then you will see why the quality of their gelatin is held in such high regards by many.

Panna Cotta

1/3 cup skim milk

1 (.25 ounce) envelope or 1 tablespoon unflavored gelatin (I prefer Great Lake Beef Gelatin)

2 1/2 cups heavy cream

1/2 cup sugar (I prefer cane sugar)

Pure vanilla bean scrapes (about 1″) or 1 1/2 tsp pure vanilla extract

In a small bowl, add milk and stir in the gelatin powder. Mix together to ensure the gelatin is well combined. In a saucepan, stir together the heavy cream and sugar.  Heat the mixture over medium heat. Bring to a full boil then pour the cream into the gelatin mixture, stirring until completely dissolved.  Stir in the vanilla and then pour into 6 ramekin dishes or into 4 glass mason jars.  Cool the panna cotta uncovered at room temperature. When the panna cotta has cool, cover with plastic wrap or top with mason jar lid and refrigerate for at least 4 hours.


Black Bean Brownies

I was very skeptical when I first saw a version of this brownie recipe a couple years back.  I thought there was no way a healthy brownie made with black beans could taste as good as a traditional brownie.   However, after I made the brownies I was a firm believer that it is truly possible and I have been on a mission ever since to convince those around me.

I have made these brownies on several occasions for family and friend celebration functions.  I enjoy not letting everyone know that the brownies are made with black beans to see how they react to their first taste.  So far I have only had positive feedback and everyone (even the biggest skeptics) have said how much they enjoy these brownies.  I have even had people who loathe black beans tell me that these brownies are the best they have ever had.

These black bean brownies are moist, rich and simply delicious.  Besides the amazing taste, the best part about these brownies is that they are actually healthy.  Traditional brownies are usually far from being healthy so it is refreshing to be able to have a dessert that tastes sinful but is not.  I would say the only bad part about these brownies is that it is hard to stop at one and knowing they are healthy makes that stopping point even harder.

The recipe below make about 10 to 12 brownies depending on how they are cut.  The recipe can be increased to fit your particular needs.  The brownies can be stored at room temperature or they can be kept longer covered in the refrigerator.

Black Bean Brownies

1 (15 ounce can) black beans (drained and rinsed)

1/4 cup quick cook oats 

3 tablespoons coconut flour

2 tablespoons unsweetened cocoa powder 

1/4 teaspoon salt

1/3 cup pure maple syrup 

a dash of pure stevia extract (or 2 tablespoon cane or coconut sugar)

1/4 cup coconut oil

1 1/2 teaspoon pure vanilla extract

1/2 teaspoon baking powder

1/2 cup semi sweet chocolate chips 

Preheat oven to 350 degrees. In a food processor, combine all ingredients (leave out chocolate chips) and blend until well combined (smooth). You may need to use a food processor agitator or stop the processor a couple times to reincorporate the ingredients that can get stuck on the sides.  After the mixture is well blended, add in the chocolate chip.  Empty the mixture into a greased (I prefer spray coconut oil) 9 by 9 square pan.

Place the brownies in the preheated oven and cook for about 18 minutes.  Remove the brownies from the oven and allow to cool on a cooling rack before cutting.  Please note the traditional brownie done test of using a toothpick will not work for this recipe.  These brownies are meant to be moist and because there are no eggs they do not need to be cooked to a certain level in order to be safe to eat.   

Add in ideas:

1/2 cup crushed walnuts

1/2 cup chopped pecans

1/4 cup shredded coconut 

1/2 teaspoon pure mint extract


Chocolate Chip Cookie – (Gluten, egg, dairy and sugar free)

Behold the classic chocolate chip cookie.  When one thinks of a cookie they will most likely think chocolate chip.  It is simple, versatile and timeless.  The traditional chocolate chip cookie recipe is historically basic in its composition.  This chocolate chip cookie recipe is by no means basic.  It takes the traditional chocolate chip cookie recipe and elevates it up one step further.  The resulting chocolate chip cookie is healthier and tastier than the traditional chocolate chip cookie.  The comparison numbers are amazing (details listed at the bottom of this page) and it is a cookie that you can feel not guilty about eating.   Compared to a Tollhouse chocolate chip cookie, this recipe produces a cookie that has 84.2% less calories, 97.9% less fat, 85% less sugar, almost three times the amount of protein and double the amount of fiber.

Traditional chocolate chip cookies are made by combining just 8 simple ingredients.  The basic chocolate chip recipe calls for butter, flour, eggs, brown sugar, baking soda, salt, vanilla extract and semi-sweet chocolate morsels.  I have taken this traditional chocolate chip cookie recipe and altered it to become a treat that is protein packed and guilt free.  Furthermore this recipe creates a chocolate chip cookie that is gluten, dairy, sugar and egg free (celiac sufferers, diabetics, vegans, and lactose intolerant people rejoice!)

Majority of the traditional chocolate chip cookie recipes have a large amount of butter in the recipe.  Since I am not a fan of using butter in my recipes, I decided to substitute butter with my favorite go to butter replacement, unsweetened applesauce.   Unsweetened applesauce has long been used as a healthy replacement for butter in baked goods.  I find it to be a wonderful substitution as it gives the baked good an amazing level of moisture and just a touch of natural sweetness.

All purpose flour always seems to be the go to flour for a classic chocolate chip cookie.  All purpose flour is a great, basic flour to use for cookies.  All purpose flour is an easy flour to use, readily available and provides a very mild taste and texture profile.  One of the problems I have with all purpose flour, though, is that as far as flours go, it lacks in nutritional value.   I wanted to create a chocolate chip cookie that was more nutrient dense.

My first thought for an all purpose flour substitute was to use whole wheat flour.   However, I started to think about how whole wheat flour has a distinct, nutty flavor and somewhat gritty texture.  While I love the taste of whole wheat in certain baked goods, I did not want my chocolate chip cookie to have whole wheat taste or texture qualities so I scratched it off my flour list.

I went through several trial chocolate chip cookie batches using an array of nutrient packed flours.  Some turned out fairly good, while others were simply unappealing.  The flour that produced the best tasting chocolate chip cookie was soy flour.  I love soy flour and do try to use it as often as I can.  It is a great flour since it is high in protein, fiber and vitamins.  It is low in saturated fat, cholesterol and carbohydrates.  Soy flour is also great because it is gluten free.  The soy flour in this recipe produces a cookie that is amazingly moist and almost doughy in its baked texture.

Traditional chocolate chip cookie use eggs in the recipe.  The eggs help bind the ingredients and it fluffs the batter while cooking.  Due to soy flour’s sticky nature, it already is a good ingredient binder.  I figured I would see if the soy flour could stand on its own without having to add eggs to my recipe.  I knew the batter might need some help in fluffing so I increased the amount of baking soda and baking powder used.

On a side note, since the batter does not contain any eggs, the batter can be eaten before it is cooked.  To say I am a huge fan of cookie dough would be an understatement.  It is normal that only a couple cookie actually get baked when I make this chocolate chip cookie recipe.  The rest get “sampled” during the mixing phase.  Sometimes I do not even bake the cookies, I just store the batter in the refrigerator and take a sample whenever I am having a cookie batter craving.

Cow milk is usually the type of milk that is called for in most chocolate chip cookie recipes.  While I am okay with cow’s milk, I wanted my chocolate chip cookie to have more nutrients in it.  When comparing cow’s milk to a non-dairy milk, such as almond milk, you will find that the non-dairy milk usually outweighs the cow’s milk.  Almond milk, for example, has more vitamins and minerals than cow’s milk.  It is lower in calories, free of saturated fats and cholesterol.  In my chocolate chip cookie recipe I have selected unsweetened vanilla almond milk as the milk of choice.  However, you can use any other milk of your choice, though you might have to experiment with the amount as I have not tested all milk options in this recipe.

In my healthy chocolate chip recipe I have replaced sugar with pure Stevia extract.  I am not a huge fan of sugar so I try to replace it when I can.  Some of the sweetness in the cookie already comes from the unsweetened applesauce portion of the recipe.   An elevated sugar note is needed in the cookie so pure Stevia extract is the sweetener I have selected.  If you are not a fan of Stevia I have included alternative sugar replacement options in the recipe.

The rest of the traditional chocolate chip cookie ingredients (baking soda, baking powder, salt and vanilla extract) are great ingredients so I have kept them in my recipe.  In regards to the chocolate chips, you have a variety of options.  If you want the cookie to be strictly dairy free and/or vegan you can use carob chips.  If you want the cookie to be more rich and somewhat less sweet, than dark chocolate chips would be the way to go.  Most would probably prefer the traditional semi-sweet chocolate chip so I have used that type in my recipe.   I like to use the mini semi-sweet chocolate morsels since they seem to disperse throughout the batter more evenly providing more chocolate taste per bite.

The recipe below makes about 5 chocolate chip cookies.  The recipe can be increased to fit your particular needs.  Cooled cookies can be stored in an airtight container or they can be frozen to stay fresh longer.  If you decide to freeze the cookies they can be defrosted by either letting them sit out on the counter for about 10 minutes or they can defrosted in a warm oven for a couple of minutes.

Chocolate Chip Cookie

1/3 cup soy flour

1 tablespoon unsweetened applesauce

1/4 cup unsweetened vanilla almond milk 

1 teaspoon baking soda

1 teaspoon baking powder

1/8 teaspoon salt

1/4 teaspoon pure vanilla extract

1/8 teaspoon pure Stevia extract (or 2 tablespoons cane or coconut sugar)

1 tablespoon semi-sweet chocolate chip morsels (you can add more if you want the chocolate taste elevated or you can use dark chocolate chips or carob chips)

Preheat oven to 350 degrees.  In a medium sized bowl, combine the dry ingredients (flour, salt, baking soda, baking powder and Stevia (or sugar of your choice).  Stir in unsweetened applesauce, unsweetened almond milk and pure vanilla extract.  Mix well.  The dough will be quite sticky, this is normal.  Line a baking sheet with parchment paper.  Scoop a ball of dough (about a tablespoon and a half of dough), roll it slightly in your hands (you can flour your hands if you would like) and place on the parchment paper.  Bake in the preheated oven for about 11 minutes (or until slightly brown).  Remove cookies from oven and allow to cool on the parchment paper atop a cooling rack.  Once the cookies have cooled they can be removed from the parchment paper.  

Cooled cookies can be stored in an airtight container or they can be frozen to stay fresh longer.  If you decide to freeze the cookies they can be defrosted either by letting them sit out on the counter for about 10 minutes or they can defrosted in a warm oven for a couple of minutes.       

Nutritional comparison

Traditional Tollhouse Chocolate Chip Cookie Recipe (serving size 1 cookie)

Calories = 118.3

Fat = 6 grams (with 3.6 grams saturated fat)

Fiber = 0.6 grams

Sugar = 6.7 grams

Protein = 1 gram

My Healthy Chocolate Chip Cookie Recipe (serving size 1 cookie)

Calories = 18.75

Fat = 0.125 grams (0 grams of saturated fat)

Fiber = 1.3 grams

Sugar = 1 gram (from applesauce)

Protein = 2.85 grams
Whole Wheat Gingerbread Flats

Christmas time is a wonderful time filled with special meanings, perfect weather, time with friends or family and of course yummy food.   This last Christmas was no short of these things and ever year I am saddened it goes by so quickly.  Over the Christmas holiday my son was home from school so I made sure we had plenty to do while we were at home.  One of the things I planned for us to do was to build a gingerbread village.  I let me son pick out one of the prepackaged gingerbread village sets they had at the store.  It came with candy decorations, white royal icing and the ever important gingerbread.

While setting up the gingerbread houses, being the dutiful mother I am, I needed to “test” out the gingerbread to ensure its quality.  That is what any good mother would do right?   The gingerbread was understandably hard (as it needs to be to stand up and hold all the icing/candy) and quite tasteless.   It might have seemed lack luster to me in the taste department only because I love the strong taste of ginger.   I use ginger in any recipe I can.  I make straight ginger tea at least once a day.  I even have a jar of sliced ginger in my refrigerator that I sneak a couple bites of whenever I get the chance.   So I guess it would be without question that the prepackaged gingerbread wouldn’t have the ginger kick I was looking for.

As usual I decided I needed to make my own gingerbread cookie.  I looked through many gingerbread recipes, learning the basics for the cookie so that I could ensure I was headed in the right direction with my own recipe.  I wanted the cookie to be healthier then the traditional gingerbread cookie so I choose whole wheat as the flour base for my recipe.  In additional to being healthier, I knew the whole wheat would give the cookie a nuttier taste and a more complex texture then bleached flour.

I wanted the gingerbread cookie to be low in sugar so I choose unsweetened applesauce instead of sugar.  Applesauce also works as a great binding and moisture component so I am using it to replace the oil and egg in a traditional recipe.  To ensure the cookie is sweet enough to make it a cookie, I also added pure stevia extract.  I kept the traditional spices of a gingerbread cookie which are ginger, nutmeg, cinnamon, clove, allspice and molasses.  Molasses and ginger are the two ingredients that really make a gingerbread cookie stand out from the rest.

This cookie recipe produces a fairly dense, yet chewy cookie.  The batter will be quite sticky.  You can either use a rolled ball technique to produce a thicker cookie or you can flatten them out using the bottom of a floured glass cup.  I prefer to flatten my cookies out so I use the floured glass up method.

Whole Wheat Gingerbread Flats

1 cup whole wheat flour

1/4 cup unsweetened applesauce

2 tablespoons molasses

1/4 cup almond milk

1/4 teaspoon baking soda

1/2 teaspoon baking powder

2 teaspoons ground ginger (add more if you want more ginger taste)

1/4 teaspoon cinnamon

1/4 teaspoon allspice

1/4 teaspoon clove

1/4 teaspoon nutmeg 

1/4 teaspoon pure Stevia extract

1/4 teaspoon salt 

Preheat oven to 350 degrees.  Combine the dry ingredients in a large bowl.   Stir in the molasses, applesauce and almond milk just until blended.  Roll the dough into small balls.  At this point you can keep the cookie in the ball form or you can flatten them out on the cookie sheet using a floured glass bottom cup (if you want a fancier cookie you can also sprinkle with granulated sugar or sugar cane).  Place the cookies about 2 inches apart on an ungreased cookie sheet. Bake for 10 to 15 minutes in the preheated oven.

If you want a crisper cookie you can bake longer or if you want a chewier cookie you can bake less.  The added bonus of having no egg in this recipe is that you never have to worry about the dough being too raw inside.  In fact you can eat the batter straight up, which I do from time to time.  Cool on wire racks.  The finished cookies can be stored in an air tight container or frozen to keep longer.  

Carrot Cake Muffins

One of my favorite things to have in the morning is a muffin.  Nothing beats the warming comfort and texture of a fresh baked muffin.  Store bought muffins are full of sugar, oils, artificial flavors, and preservatives.  Since I love muffins but wanted a healthy alternative to the store produced ones, I decided to do some experimenting and make some of my own.  I wanted a muffin that was high in protein and fiber but low in sugar.   I came up with the carrot cake muffin recipe listed below.  As an added bonus this recipe is gluten free, egg free, and dairy free!

In my carrot cake muffin recipe I decided to use soy flour for the base of the muffin.  Soy flour is an excellent source of protein and it also makes the muffins more moist then a traditional white or wheat flour.    I choose carrots because of their fiber content, pleasing texture and the sweet flavor that they would bring to the muffins.    As an oil substitute I selected unsweetened apple sauce.  Unsweetened apple sauce is probably one of my favorite ingredients to add to baked goods.  It keeps the baked good moist while adding a touch of sweetness.

Instead of traditional sugar I decided to use Stevia extract.  Stevia is a wonderful sweeter that is natural, low in calories and will not effect your insulin levels.   I purchase my Stevia extract in a powder form from Nuts.com.  The Stevia powder that Nuts.com offers is Stevia in it’s purest form.  Most, if not all, of the Stevia extract you will find in the stores have added fillers like dextrose or erythritol (a sugar alcohol).   With the pure Stevia extract you do not need to use as much and is far cheaper then purchasing any of the Stevia produces in the store.  If you do not like the bitterness that some say comes with Stevia then any other sweetener would work in it’s place.  Since Stevia is stronger by volume then most other sweeteners you most likely need more of what ever sweetener you used in place of the Stevia.

Carrot Cake Muffin Recipe

2 cups grated carrots

2 cups soy flour

2 teaspoon baking soda

2 teaspoon baking powder

2 teaspoon cinnamon

1 cup almond milk 

1/2 cup unsweetened applesauce

1 teaspoon Stevia powder

1/4 teaspoon salt

2 teaspoon vanilla extract

Preheat oven to 400 degrees.  Lightly grease a standard 12 muffin pan or line the pan with muffin cups.  In a medium sized bowl, whisk together the dry ingredients.  In a small bowl, whisk together the applesauce, vanilla and almond milk.  Stir the wet ingredients into the dry ingredients. Fold in the grated carrots and stir to combine.  

Scoop the batter evenly into the muffin pan or muffin cups.  Fill the pan or cups about 3/4 full.  Bake in the preheated oven for about 20 minutes or until the tops of the muffins will feel firm to the touch.  Cool muffins completely.  Muffins can be stored in an airtight container or they can be kept longer in the freezer.  

Please note due to the soy flour, this recipe produces a dense type muffin.  The carrot cake recipe can be varied by adding walnuts and/or raisins.  Also if you wanted a fancier muffin you could add cream cheese frosting!